Figma is one of the most popular designing tools out there that let us create prototypes and wireframes of all kinds. If you explore more features of Figma, then you can create high-fidelity designs with the Figma animation option. In this post, I’m going to make you familiar with Figma smart animate and other inbuilt tools of the application. Not just that, I will also list a stepwise tutorial to use the best alternative to Figma auto animate here.
- Part 1. 4 Methods to Create Animation in Figma
- Part 2. 5 Animation Creation Tips and Tricks in Figma
- Part 3. Detailed Steps to Create Animation in Figma
- Part 4. How to Create Animations in the Best Figma Alternative
Different Ways to Create Animation in Figma
Since Figma is such an extensive tool, it provides different options to create animations in it. Ideally, there are four ways to create animation in Figma that you can explore.
Method 1: Export a GIF
As you know, Figma can export different media files like images and videos to any design. Therefore, you can first create your animation and save it as a GIF. Later, you can just import it to Figma and place it on any component.
Method 2: Use the Figmotion Plugin
If you are fine with using third-party plugins, then you can install Figmotion in Figma. It is a popular Figma animation plugin that can create all kinds of animation in the tool and readily add them to your projects.
Method 3: Figma Prototyping
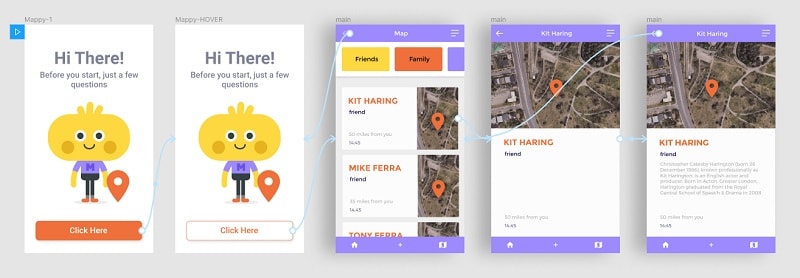
You can also take the assistance of Figma prototype animation that would just link various components. You can set up values for actions like clicking or hovering and change the behavior of any component for it. There is also a provision to write back-end codes on Figma with third-party tools.
Method 4: Figma Smart Animate
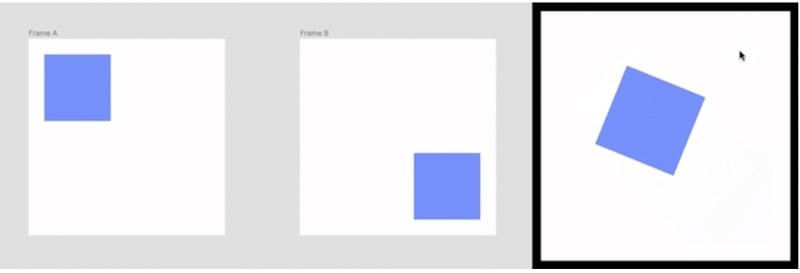
Figma smart animate is one of the best ways to create animation in Figma by connecting different frames and setting up their motion. It is similar to doing key-framing in Figma. For instance, let’s consider these two frames. The Figma auto animate feature can link and flip them to make it look like an animation.
5 Animation Creation Tips and Tricks in Figma
1. Avoid Inflexible Movement
Animation is all about flexibility in your design. If you don’t have the flexibility in your animation, your animation looks rigid and behaves abnormally. You can add flexibility in Figma animation. Generally, if an object moves with squashing and stretching, it can create the illusion of the real world.
Stretching an object may provide soothing effects on the viewer’s eyes. Sometimes, it may not work as planned, but it can give you an idea of how hard and softness of the object. If the object feels softer, then it should be squash and stretch more.
2. Anticipation
Your design should reflect the real world. Take ideas from real-world examples and implement them in your design. Don’t just throw your objects onto the screen. With some anticipation, your design looks real and alive. Imagine you are about to throw a ball; before throwing the ball, your hands would first go in the opposite direction.
Putting your anticipation inside your Figma animation will give the viewers an idea of what’s to come and its purpose. So, it’s better not to design a robotic animation that comes out of nowhere on the screen, which doesn’t make any sense in front of viewers.
3. Follow Through
Anticipation and follow-through are relatable to each other. One is the starting point, and the other is the ending point. Anticipation determines how to start your object’s movement, and follow-through is all about how you end it?
As we mentioned in the last part, your object’s movement should depict the real world, not in a robotic manner. In the real world, whenever an object stops it doesn’t stop at once. So, adding a little bit of movement inside your Figma animation will give a more realistic look.
4. Make Your Drawings More Realistic
The only thing that gives life to your design. So, it’s equally important to design a more realistic design for your Figma animations. Starting the journey with 2D design? Here’s the tip, go with the solid design. Even though if you’re presenting your objects in two dimensions, they should feel like they are in three sizes.
Practice more and more on the 2D and 3D drawings, so your design should look more realistic and astonishing. You should pay attention to the things like volume, weight, and balance of all items or objects you’re using inside your Figma animation.
5. Appealing Animation
As we earlier said, create a design that should make any sense to the human eye. You are about design Figma animation for humans, not for robots. Your animation looks appealing when you bring a realistic approach to your design.
Always focus on the basic principles and the requirements of the design. When you are creating your design, It’s very easy to get lost in the design. Just remember your audience by whom you’re creating the graphics or visuals. It’s better to gather all the requirements first, then draw a rough sketch on paper. It will help you a lot in generating more creative ideas and thoughts.
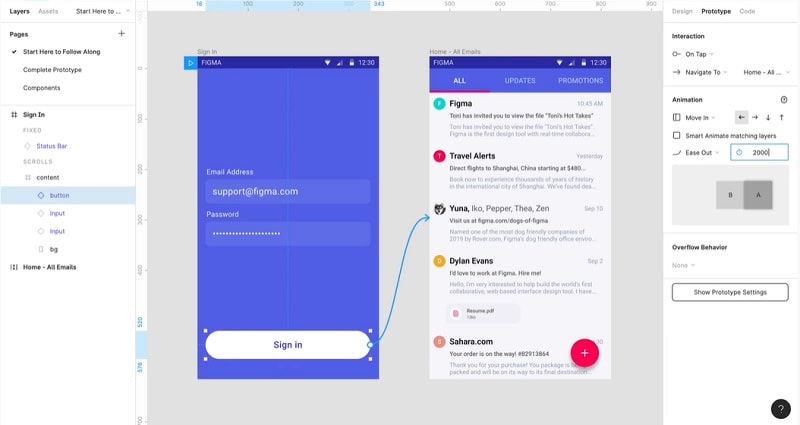
How to Create Animation in Figma with Smart Animate
As you can see, the best way to implement Figma animation is by using the Smart Animate tool. Since it is an inbuilt feature in Figma, you won’t have to put a lot of effort into using the Figma Auto Animate option. To create animation in Figma, the following steps can be taken.
Step 1: Work on the basic design
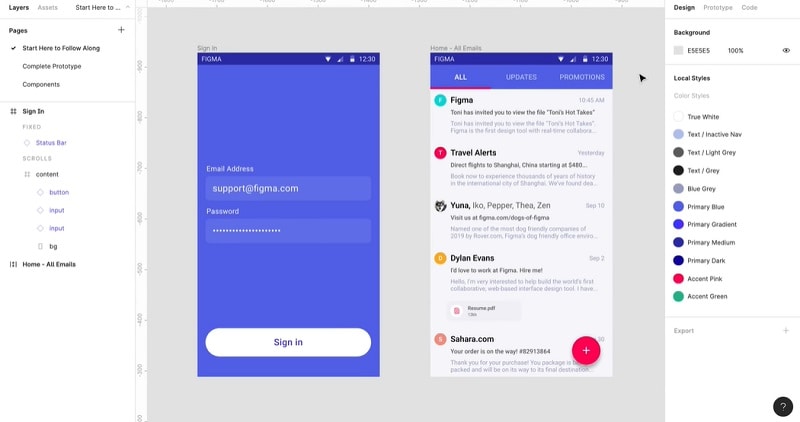
At first, you can just launch your Figma dashboard and use its existing tools to work on the basic prototype. If you want to overlay different screens, then you can place them in a single project as well.
Step 2: Use the Figma Smart Animate tool
To use the Figma animation feature, you can go to the Prototype tab from the sidebar. From here, you can choose to create a connection. This will simply let you create a link between the components of both screens.
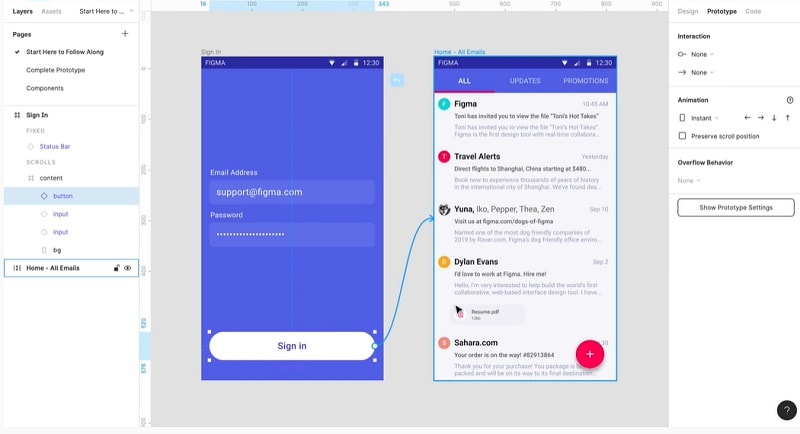
Once the interaction is established, you can again go to the Prototype tab and visit the Animations section. Here, you can change the animation style and value to attain a smooth transition. If you want, you can just enable the Figma Smart Animated feature that would overlay both the screens seamlessly.
Using the Figma auto animate feature, you can work on other dynamic objects as well and export your designs in the end.
This post was originally from mockitt.com


Leave a Reply